Tuesday, May 07, 2013

weekend of stitches

...and I made more ~ I'll show you the rest tomorrow, once all the weekend orders are packed and posted!


Friday, May 03, 2013

let the making begin!

This little felties were finished last night....just in time to get the orders out before the long weekend.
I am planning on doing a lot more sewing over the next three days.  John is going to be busy too, doing car things in the garage, but I'm sure we'll get out and about in the sunshine too...don't you just love Bank Holiday Weekends!...

Thursday, May 02, 2013

Name Banners

 I finished taking photos and can *finally* show you my new handmade product!
 Felt & Fabric Name Signs / Banners - I love the colours and the boldness of them...
 ...They are completely hand cut and hand sewn by me....and the customer chooses the fabrics so each sign will be unique!
 I have designed these specifically with my Not On The High Street shop in mind - personalised gifts seem to do well on that website, as do designs that are a little bit different - and I hope these fit both of those criteria!
there's a link to my NotOnTheHighStreet shop here if you want to see more :-)


Wednesday, May 01, 2013

something new is coming

I've been working on a new handmade product line - the samples are sewn & the swatches for the photos are complete - all I need is some sunshine tomorrow morning to finalise all the photos and I'll be ready to launch!  I'm so excited!


Tuesday, April 30, 2013

Pretty Pastels

I've just added 3 new colour button mixes to the shop ::
First is Lace.  A mixture of white, cream & ivory buttons...
Second :: Baby Blue -
and third :: Baby Pink -
The Baby Blue & Baby Pink mixes are all small buttons, and the Lace mix has buttons of all sizes.
Aren't they pretty?
The prices are good too - just £1.25 for 50g ....or £2 for 100g!
They are on the website here

Monday, April 29, 2013

bright birds

this weekend was a weekend of two halves - Saturday I spent HOURS doing the accounts *yawn*, but it meant I had the whole of Sunday to sew - yippee!
 This past week I had a little flurry of orders for these little bird decorations - so I decided to make extras too in case the flurries continued
  It is so satisfying to see them all piled up in their cheerful little piles
The pattern for these birds is in my tutorial section, up the top there - or you can find it by clicking here
**************************************************
special offers update ::
sale felt is still available on eBay (but it's going fast!) click here and here to see
the buy 3 for the price of 2 offer on sewing threads is still live but will be gone tomorrow, so best be quick if you need some bargain threads.  click here to read the details.  click here to see the threads.

Thursday, April 25, 2013

SALE felt

All my discontinued felt has now been reduced ... it's all brand new 30% wool felt....
...there are 12" squares that work out at 50p each...

...and felt pieces (50cm x 90cm) that are £2.50 each

They are all only for sale on Ebay and once they are gone they are gone! ::
squares are here
pieces are here

Wednesday, April 24, 2013

About Time Too + special discount codes

When I launched my 40% wool felt last year it also meant that I changed the colours of threads I sell - but I didn't update the photos and, as all my website shoppers will know, when they bought threads the photos were of felt colours, rather than reels of cotton.
Which is, quite frankly, a little bit rubbish.
But today I have finally rectified this - I have photographed all 45 threads, alongside the felt they match,  AND I have a special offer too!
 If you buy two reels of thread you get a third for free - it's a wonderful way to celebrate right?
To claim your free threads you need to enter a code on the website (this is the only way I could workout how to do it) - and the code you use is dictated by how many threads you put in your shopping basket ::
if you buy 3, use the code Ibought3 and the price of one reel will be discounted (£1.65)
if you buy 9 the code Ibought9 will give you a discount of three reels (£4.95)
make sense?
I hope so!
All the thread colours are well stocked as I type, but it is first come first served - offer ends on Monday 29th April (or before if all the thread is sold!!)  I will definitely be re-stocking all the colours so you'll always be able to get matching threads.

SPECIAL OFFER
buy two reels of thread and get the third for free!

Use ONE of the following codes at the checkout:
Ibought3 
Ibought6
Ibought9
Ibought12
Ibought15
Ibought18
Ibought21
Ibought24
Ibought27
Ibought30
Ibought33
Ibought36
Ibought39
Ibought42
Ibought45
See my threads by clicking here
PS you can see all the codes on the website too!
PPS if you fancy stocking up and buy a thread rainbow please use the code Ibought45 it will reduce the price from £69 to £44.25.  Which is a total bargain!

Tuesday, April 23, 2013

Felt Flower Tutorial

I think this tutorial has been waiting for some sunshine - sewing all of these colours whilst sitting in the sun was so much fun - the perfect crafty pick-me-up!
If you would like to make your own bunch of ever-lasting flowers then this is the blog post for you!
You will need ::
felt - in all your favourite colours
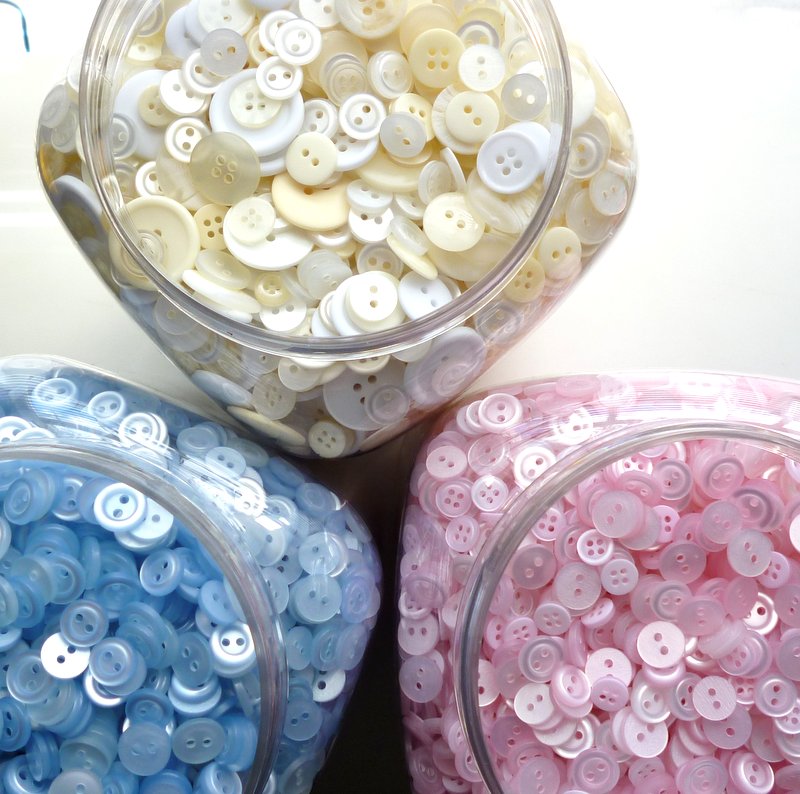
buttons - in all sorts of sizes and colours, the more the merrier I think!
fabric scraps - if you wish
jug/vase - anything to display them in
glue - if you prefer to glue, or you can stitch
thread - in pretty colours
scissors - of course!
felt stems - in various shades of green
wire & wire cutters - so you can be a florist for the day
AND this pattern ::
which needs to be printed out as an A4 sheet
To start - cut out lots of felt flower shapes using the templates.  There are no set colour combinations, or any limit to which shapes to use - the choice is entirely yours - when cutting the felt out I cut two layers for each flower shape, but only one for each circle - the circle flowers are all made with 3 different size circles which makes them sturdy.
To give the circle flowers some more oomph I stitched all three layers together in the centre with a ring of running stitches (imagine there is a 2p piece in the middle of the flower and stitch around it)...pull the thread tight and the flower will gather and become 3d.
Once all your flower shapes have been cut out and you've gathered your circle flowers you can start embellishing - you can add buttons, fabric scraps, fabric yo-yos, embroidery stitches - whatever you fancy doing will work!
fabric yo-yo with a teeny tiny button inside & stitches on the petals
two colours of thread alternated
ric rac poking out between the layers
Once all your flowers are embellished you need to attach the second layer (the back) of your flower shapes (remember you cut 2 of each earlier?) I used felt glue but you can stitch them together round the edge if you prefer.
To attach the flower to the stem I used a big slip stitch - it's easy to sew through the edge of the stem but impossible to sew through the centre of it because it's so tough!  If you are careful you won't see any of this stitching from the front.  Obviously I did it in beige so you can see it - green thread would look better ;-)
Next you need to wire them - just like a florist would.  I had some wire & wire cutters in my old art box, if you don't have any ask around - someone you know will have some in the shed somewhere!  I cut a long length and folded it in half, carefully poked it through my stitching (see the little loop on the left?) and then wrapped and wrapped and wrapped until the whole stem was wired.
If you have used a lot of buttons and your flowers are heavy you will need more wire - less heavy flowers don't need so much
I left all of my stems quite long and folded them at the bottom so they are the perfect heights for my vases - that way I can re-arrange in the future and none of them will be too short - of course I only figured this out half way through, but most of them are left long!
I filled my vases with buttons because I like buttons, but you don't need to do that...nor do you need to get out in the sunshine and take photos of your flowers, but if you do I (and my readers!) would love to see them!
So there we have it - my long time in the making tutorial -  it's not really a tutorial with photographs of step by step instructions, more a gathering of ideas and methods to achieve them, but I hope it inspires you all the same :-)
*****************************************************
links to the shop
felt - click here
buttons - click here
fabric - click here
felt stems - click here

Monday, April 22, 2013

...it's coming....

...finishing touches, photographs, some instruction typing and the tutorial will be ready - after all this build up i just hope you like it!

Friday, April 19, 2013

inspiration

John cut, folded and wrapped these packs for an order yesterday...
 ...they are Brights & Pastels - and each bundle has half a metre per colour. 
The packs come in 10 colour ways and 5 different sizes -  6", 12" or 24" squares, mini rolls or half metre cuts - I sell tonnes more 6" square packs than I do half metre packs!
 I think they look glorious like this - even though I have tonnes of felt in every colour (of course!) I took one look and said 'I want them'
 Naturally John raised his questioning eyebrow at me and thought I was crackers - but I stick by it.  I do want them.  I think they are inspiring - two bundles of colour just waiting to be cut and sewn into amazing things....
If you had one (or both!) of these what would you sew?

Thursday, April 18, 2013

order sewing

look at all these bright colours!
It was fun making this little cheerful group of goodies :-)